Find the Top Rated & Best Resin Epoxy Available with 1000's of reviews


Epoxy Resin Resources
Explore the resources you will need during your resin epoxy project.
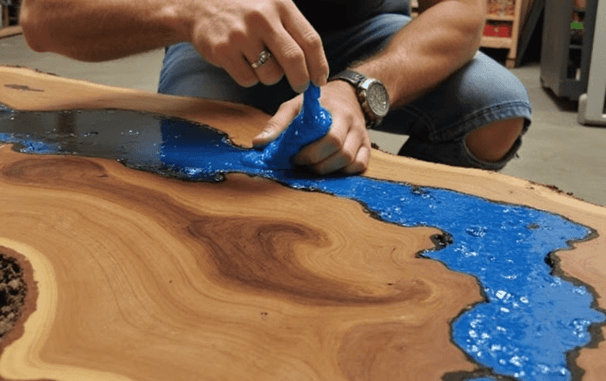
How to Epoxy over ANY Existing surface | Stone Coat Epoxy
In How To Epoxy over any existing surface we show you the easy steps and right way to install epoxy over your old laminate countertops and save thousands on your kitchen, bathroom and other home or office spaces. Stone Coat Epoxy is your ticket to a fabulous living or working space! Learn step by step all the Pro tips and tricks to renovation and follow along with your own beautiful epoxy projects!

Easy 1-2-3 Resin Epoxy Process
1. How To Measure Your Surface & Calculate


Use the Step-By-Step Process Below To Calculate The Amount of Epoxy You Will Need For Your Project
Step 2 -How To Choose The Right Resin Epoxy
1️⃣-Gather Tools 🧰
Tape Measure & Calculator (phone)
2️⃣- Measure Your Surface 📐
Use your Tape Measure
Measure - Length X Width
3️⃣- Calculate the Total Square Feet 🧮
Length x Width = Total Area
4️⃣-Calculate Epoxy Need 🎨
Total Area ÷ 20 = Gallons Need


Step 1 - Measure
Click The Green Button For a Free Download for Instruction on Choosing the perfect epoxy
2. How To Choose The Right Resin Epoxy
3. How To Apply Resin Epoxy
Use Our Simple 1-2-3 Step Process for Measuring Epoxy Resin, Choosing Epoxy, and Applying Epoxy Resin - Its Simple!
Step 3 - How To Apply Epoxy Resin
✨Magic Formula ✨
Area ÷ 20 = Gallons Needed
(To calculate epoxy for your project)*ADD 20% to be SAFE*
🛠️ Tool & Material Checklist
✨ Prep Tools & Materials
Protective Materials
☐ Painter’s Tape
☐ Plastic Sheeting / Drop Cloths
☐ Rampboard
Surface Prep Tools
☐ Spatula
☐ Bondo / Epoxy Filler (for filling cracks)
✨ Mixing Tools & Materials
Mixing Tools
☐ Mixing Buckets
☐ Measuring Cups
☐ Drill Paddle Mixer
☐ Rags
☐ Denatured Alcohol (for cleaning)
☐ Gloves
✨ Application Tools & Materials
Application Tools
☐ Squeegee
☐ 7-inch Roller (3/16-inch nap or 1/4-inch nap)
✅ Step-by-Step Instructions
1️⃣ Step 1: Protect Your Space
Tools & Materials
☐ Painter’s Tape
☐ Plastic Sheeting / Drop Cloths
☐ Rampboard
Do's
☑ Tape off edges carefully, ensuring no tape overlaps or leaves gaps.
☑ Use plastic to protect cabinets and floors, making sure it’s tightly secured.
Don'ts
❌ Avoid skipping plastic sheeting – epoxy splatters are real, and you don’t want a mess!
❌ Don’t rush the taping process; improper taping can cause uneven lines.
2️⃣ Step 2: Prep the Surface
Tools & Materials
☐ Spatula
☐ Bondo / Epoxy Filler
Do's
☑ Sand the surface lightly to create a smooth base.
☑ Use a spatula to apply filler to any cracks, filling them completely.
Don'ts
❌ Don’t leave any gaps or holes in the surface. A smooth finish is key for a clean epoxy application.
❌ Avoid using an excessive amount of filler, as it may cause uneven coverage.
3️⃣ Step 3: Clean the Surface
Tools & Materials
☐ Denatured Alcohol
☐ Rags
Do's
☑ Clean the surface thoroughly using denatured alcohol. Wipe down multiple times.
☑ Ensure there is no residue left before applying primer.
Don'ts
❌ Don’t skip the cleaning process – dust, oils, and debris will interfere with your finish.
❌ Never clean with a dirty rag – always use a clean cloth for best results.
4️⃣ Step 4: Apply the Primer
Tools & Materials
☐ Measuring Cups
☐ Mixing Buckets
☐ Drill Paddle Mixer
☐ 7-inch Roller (3/16-inch nap or 1/4-inch nap)
Do's
☑ Mix the primer thoroughly using a drill paddle for at least 2 minutes.
☑ Use a roller to apply in a W-pattern, ensuring even coverage.
☑ Work in small sections at a time, avoiding overlapping on wet areas.
Don'ts
❌ Don’t overwork the primer or apply it too quickly – it can cause bubbles or uneven areas.
❌ Never apply a thick layer of primer – thin coats are better for smooth, even results.
5️⃣ Step 5: Sand & Clean Again
Tools & Materials
☐ 120-grit Sandpaper
☐ Rags
Do's
☑ After the primer has dried, sand the surface lightly with 120-grit sandpaper.
☑ Vacuum up all dust and wipe with a clean rag to ensure the surface is smooth and clean.
Don'ts
❌ Don’t use too much pressure while sanding; you want a light, even surface.
❌ Never skip the sanding process – it’s critical for the next layer to adhere properly.
6️⃣ Step 6: Apply Epoxy
Tools & Materials
☐ Mixing Buckets
☐ Measuring Cups
☐ Drill Paddle Mixer
☐ Squeegee
☐ 7-inch Roller (3/16-inch nap or 1/4-inch nap)
Do's
☑ Mix the epoxy thoroughly for the recommended time using a drill paddle.
☑ Use a squeegee for the initial spread, then follow with a roller in a W-pattern.
☑ Work in small, manageable sections and complete each section before moving on.
Don'ts
❌ Don’t mix too much epoxy at once – it can start to thicken before you finish applying it.
❌ Never leave a section unfinished for too long – the epoxy can start to cure and become difficult to work with.
7️⃣ Step 7: Apply the Clear Coat
Tools & Materials
☐ Mixing Buckets
☐ Measuring Cups
☐ Drill Paddle Mixer
☐ 7-inch Roller (3/16-inch nap or 1/4-inch nap)
☐ Squeegee
Do's
☑ Mix the clear coat as directed, and pour into a clean paint pan.
☑ Apply using a W-pattern, ensuring the epoxy is spread evenly.
☑ Keep the clear coat layer thin to avoid streaks or uneven areas.
Don'ts
❌ Don’t use an old roller or squeegee that might leave dust or debris in the clear coat.
❌ Never rework a section once the clear coat starts to dry – it will cause uneven spots.
✅ Trusted Reviews – Get honest, expert insights on the best epoxy products available.
🎨 Proven Application Methods – Follow our step-by-step guides for a flawless, professional finish every time.
🛠️ Top-Quality Materials & Tools – We recommend the best tools and materials to ensure durability and stunning results.
🚀 Easy for DIY & Pros – Whether you're a beginner or an expert, our process makes epoxy application simple and stress-free!
Subscribe to our newsletter
Enjoy exclusive special deals available only to our subscribers.
Contact Us for Epoxy Inquiries
Reach out for expert advice on epoxy products and reviews.


Reviews
Contact
Join & Save
certifiedepoxyreviews@gmail.com
1-772-494-3021
© 2025. All rights reserved.